Quick start
This guide will instruct you in writing, deploying, and using your first Jstz smart function.
Prerequisites
-
Install Node.JS,
npm, and Docker. -
Install Jstz as described in Installation.
To verify your installation, run this command to check the version of Jstz:
jstz --version -
Install the Google Chrome browser, which is the only browser supported by the Jstz development wallet.
It will also help to have a basic familiarity with Typescript.
What is Jstz?
Jstz allows you to deploy smart functions, which are JavaScript applications that behave like serverless applications, small applications that run only when called and do not have a persistent presence in memory on any specific server. Jstz smart functions run on the Tezos blockchain via Smart Rollup technology.
Running on Tezos provides smart functions with many of the same advantages as smart contracts on Tezos:
- Smart functions are persistent, transparent, and immutable, which allows users to trust that they will stay available and will not change how they behave or be shut down
- Smart functions are censorship-resistant, because they are deployed on distributed Jstz Smart Rollup nodes and therefore no one can block calls to them
- Smart functions have no long-term hosting cost; they incur a cost only when called
- Smart functions have built-in authentication via user account encryption keys
Also, because smart functions run on a Tezos Smart Rollup instead of directly on Tezos, they have the additional benefits of low gas cost and reduced latency that Tezos layer 2 provides.
1. A sample smart function
Like smart contracts, you compile and deploy smart functions and then they cannot be changed. However, smart functions behave more like web applications because they accept requests and return responses in a way similar to ordinary web-based HTTP requests.
The sample smart function in the examples/counter folder of the Jstz repository stores an integer and allows users to retrieve it or change it by adding or subtracting 1.
This smart functions demonstrates how smart functions provide transparent, trustable, unchangeable logic and how they can store persistent data that no other source can manipulate.
Its code is written in ordinary TypeScript:
// <src="examples/counter/index.ts">

// Get the current number from storage
const get = (): number => {
  const num: number | null = Kv.get("myNumber");
  return num || 0;
};

// Set the number in storage
const set = (num: number) => {
  Kv.set("myNumber", num);
};

const handler = async (request: Request): Promise<Response> => {
  // Extract the requester's address and URL path from the request
  const requester = request.headers.get("Referer") as Address;
  const url = new URL(request.url);
  const path = url.pathname.toLowerCase();

  console.log(`${requester} calls ${path}`);

  let responseMessage = "";

  switch (path) {
    case "/increment":
      set(get() + 1);
      responseMessage = "Incremented. Current value is " + get();
      break;

    case "/decrement":
      set(get() - 1);
      responseMessage = "Decremented. Current value is " + get();
      break;

    case "/get":
      responseMessage = "Current value is " + get();
      break;

    default:
      responseMessage =
        "Call the URL path '/get', '/increment', or '/decrement'.";
      break;
  }

  return new Response(JSON.stringify(responseMessage));
};

export default handler;
This smart function consists of these elements:
-
Two utility functions that read and write data with the Jstz key-value store. Each time a smart function is called, it runs in a new environment and therefore it must store any persistent data in the key-value store. This smart function stores the current number in the key-value store with the key
myNumber.Only the function itself can write to its storage. Smart functions cannot read the data of other functions, but the data is publicly visible to applications outside of Jstz via the client API.
-
A
handlerfunction.The handler function is the sole entrypoint of a Jstz smart function; it is what runs when a client calls the smart function. The handler function receives a Jstz request object that includes the address of the account that called it in its
Refererheader and an optional request body. It must return a Jstz response object or a promise that resolves to a response object. In this way, smart functions behave much like conventional web server handlers or cloud functions.In this case, the handler runs this logic:
- Using the request object, it gets the address that sent the request and the path called.
- It logs the requester and the path they called.
- It uses an ordinary JavaScript
switchstatement to branch based on the path called. Smart functions can branch from thehandlerfunction in any way that makes sense for the application. - Depending on the path in the request, the smart function increments or decrements the value or simply gets the current value.
- The smart function returns a response to the caller with a message.
-
An
export defaultstatement.export defaultis JavaScript syntax required for defining an ECMAScript module. Smart functions must have a default export of a function that has the following type:type Handler = (req: Request) => Response | Promise<Response>;
2. Deploying the smart function
Follow these instructions to deploy the sample smart function to a local sandbox:
-
Start the Jstz local sandbox in a Docker container:
jstz sandbox --container startIf you see an error that says that the configuration file is improperly configured, delete the
~/.config/jstz/folder and try to start the sandbox again.tipThe
--detach(-d) flag starts the sandbox in the background, allowing you to continue working in the same terminal. You can stop or reset the sandbox with the commandsjstz sandbox --container stoporjstz sandbox --container restart, but the state of the sandbox is not persistent.When the sandbox starts, it shows the bootstrap accounts and their balances on Tezos layer 1, which you can use to fund smart functions and user accounts in Jstz via the Bridge.
-
Open a new terminal window, clone the Jstz repository and navigate to the
counterexample:git clone https://github.com/jstz-dev/jstz.git && cd jstz/examples/counterYou may see an error that says
.envrc is blocked.You can ignore this error because it refers to setting up a development environment to build Jstz locally. -
Install the dependencies for the counter smart function:
npm install -
Run this command to compile and deploy the smart function to the sandbox:
npm run build
jstz deploy dist/index.js -n dev
If this is your first time deploying a smart function, the
deploycommand prompts you to create a Jstz account. You can use any local name and passphrase for the account. Later, you can create accounts with thejstz account createand switch accounts with thejstz loginandjstz accountcommands. As described in Accounts, command-line accounts are stored in the local file~/.config/jstz/config.json.Upon successful deployment, Jstz assigns the smart function a unique
KT1address. This address is its identifier, similar to an IP address or a smart contract address. Now the smart function is accessible through a URL of the formatjstz://<ADDRESS>/, where<ADDRESS>is the address of the smart function.After you deploy the smart function, you cannot delete it or change it.
3. Calling the smart function from the command line
After a successful deployment, you can call the smart function in a way similar to sending an HTTP request. Jstz provides a command-line command to call smart functions that you can use to test and inspect deployed smart functions.
-
Run this command, where
<ADDRESS>is the address of the deployed smart function:jstz run jstz://<ADDRESS>/increment -n devThe command returns the response from the smart function:
"Incremented. Current value is 1". -
Check the value of the smart function's key-value store by running this command:
jstz kv get -a <ADDRESS> -n dev "myNumber"The response is the value of the
myNumberkey in the smart function's storage.
Congratulations! 🎉 You have now successfully deployed and crafted a Jstz request to run your first smart function.
For debugging, you can listen to the log of a smart function with the command jstz logs trace which behaves like the Linux command tail -f.
You can also send a request and view the log messages generated from that request by adding the --trace flag to the jstz run command.
4. Installing the Jstz development wallet
To use Jstz in a web application, you need a browser-based wallet to sign transactions cryptographically on behalf of your account. Jstz currently has a browser-based wallet for development purposes.
This wallet is for use in development. It is not yet secure enough to use in production applications.
-
Install the Chrome web browser.
noteThe Jstz dev wallet supports only the Chrome web browser.
-
Download the source code for the dev wallet:
git clone https://github.com/jstz-dev/dev-wallet.git -
Install Node.JS version 22 or later.
-
Go into the repository, install the dependencies, and build the wallet:
cd dev-wallet && pnpm i && pnpm build -
In Chrome, open the extensions page at
chrome://extensions. -
At the top right of the page, use the radio button to enable Developer mode.
-
Click Load unpacked, select the
distfolder of thedev-walletrepository, and then click Select to install the extension from the built files.The Jstz dev wallet appears in the list of extensions in the browser.
-
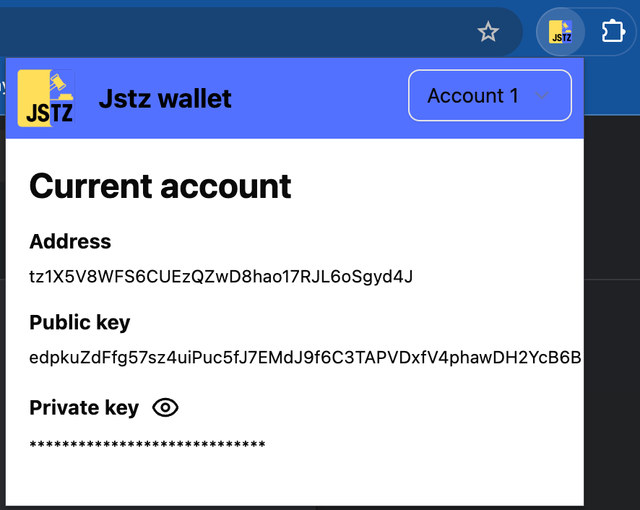
Create an account in the dev wallet by clicking the extension icon and then clicking Generate new wallet.
Now when you click the extension, it shows your account. This account is managed by the extension and is not linked to the account that you used to call the smart function on the command line.
5. Interacting with the smart function in a web application
Smart functions can provide a secure, transparent backend for web applications. Follow these steps to run a sample web application that uses your smart function as a backend:
-
On the same system as you are running the Jstz sandbox, build and run the
web-call-to-jstzsample application from thedev-walletrepository:cd examples/web-call-to-jstz
pnpm i
pnpm dev -
Open the application in Chrome at
http://localhost:3000. -
Paste the address of your smart function into the web application.
-
Click one of the buttons under the address field.
The wallet extension opens and prompts you to sign the Jstz transaction with your account.
-
In the extension, click Sign to sign the transaction.
The web application sends the signed transaction to Jstz and updates its status message to say that it is waiting for a response. When the web application receives the response from Jstz, it updates the message, as in this screenshot:

This web application demonstrates how Jstz can provide secure authentication and backends for web applications. From here, you can customize the smart function and application to accept more complex requests, store more data, and manage payments in tez, the currency of Jstz and the Tezos blockchain. You can also try writing your own smart functions and web applications or experiment with the Examples.
And that's it! You are now equipped to battle the evil forces of centralization. Go forth and do Jstz 👊!